Creating the views (windows)
In this step we will create the windows for the application. In the previous step we already created the user controls. Windows are a great way to show in an edit-context. Catel provides great edit-windows in the form of the DataWindow. This is a window that automatically adds OK and Cancel buttons (but of course allows customization of the buttons and behavior).
Person window
It is very important that the window derives from one of the Catel windows. This is required to make the binding system work (same as UserControl). Make sure that the window definition in the xaml is either catel:Window or catel:DataWindow
To add a new DataWindow, right-click the Views folder in the solution => Add => New item… => On-line => and search for Catel as you can see in the screen below:
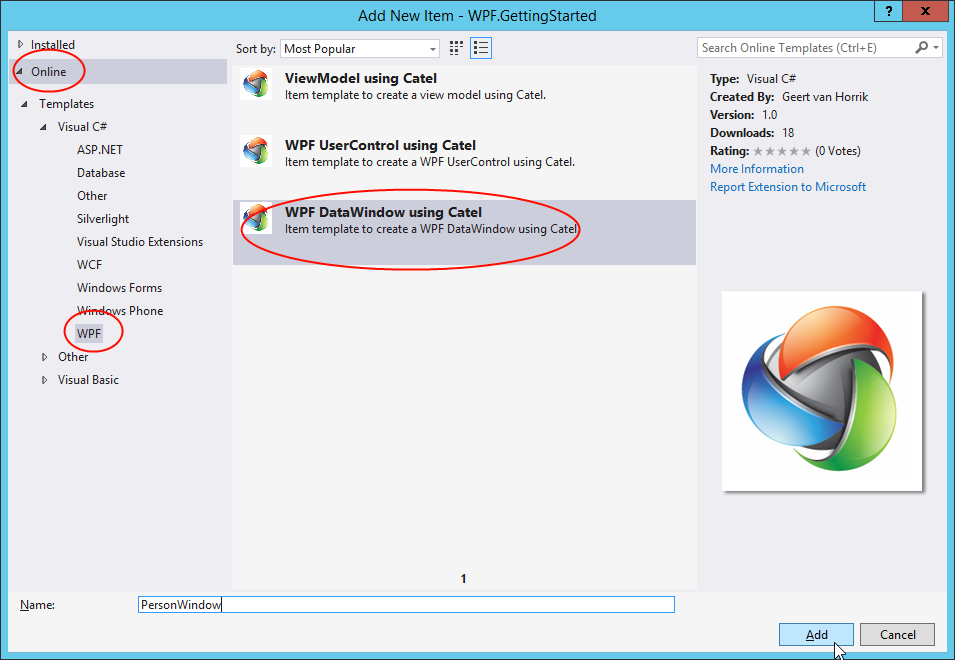
Give the new view the name PersonWindow. The view will be added to the Views folder.
Note that we can use the PersonViewModel for both the PersonView (user control) and PersonWindow. Both views represent the same models and view models, just a different context. To make sure that the IUIVisualizerService knows what view to pick first, register the PersonWindow in the IUIVisualizerService at application startup:
var uiVisualizerService = serviceLocator.ResolveType<IUIVisualizerService>();
uiVisualizerService.Register(typeof(PersonViewModel), typeof(PersonWindow));
The template will also create a constructor to inject a view model into the window. Please make sure that the constructor takes a view model of the type PersonViewModel instead of the generated PersonWindowModel. Then replace the content of the view with the xaml below:
<Grid>
    <Grid.RowDefinitions>
        <RowDefinition Height="Auto" />
        <RowDefinition Height="Auto" />
    </Grid.RowDefinitions>

    <Grid.ColumnDefinitions>
        <ColumnDefinition Width="Auto" />
        <ColumnDefinition Width="*" />
    </Grid.ColumnDefinitions>

    <Label Grid.Row="0" Grid.Column="0" Content="First name" />
    <TextBox Grid.Row="0" Grid.Column="1" Text="{Binding FirstName, ValidatesOnDataErrors=True, NotifyOnValidationError=True}" />

    <Label Grid.Row="1" Grid.Column="0" Content="Last name" />
    <TextBox Grid.Row="1" Grid.Column="1" Text="{Binding LastName, ValidatesOnDataErrors=True, NotifyOnValidationError=True}" />
</Grid>
Family window
The FamilyWindow is a bit different because we want additional logic in this window. We want to create add / edit / remove buttons for the family members. Therefore we need to create a separate view model which contains this logic.
Creating the FamilyWindowViewModel
Since the FamilyWindowViewModel will look a lot like the FamilyViewModel, just copy/paste the FamilyViewModel and rename the copy to FamilyWindowViewModel.
Note that the FamilyWindowViewModel needs additional logic, but that will be handled in the next part of this getting started guide
Creating the FamilyWindow
Once the FamilyWindowViewModel is created, the FamilyWindow must be created exactly the same way as the PersonWindow. Again make sure to use the right view model (FamilyWindowViewModel) in the constructor of the window in the code-behind. Then use the following xaml:
<Grid>
    <Grid.RowDefinitions>
        <RowDefinition Height="Auto" />
        <RowDefinition Height="Auto" />
        <RowDefinition Height="*" />
    </Grid.RowDefinitions>

    <Grid.ColumnDefinitions>
        <ColumnDefinition Width="Auto" />
        <ColumnDefinition Width="*" />
    </Grid.ColumnDefinitions>

    <Label Grid.Row="0" Grid.Column="1" Content="Family name" />
    <TextBox Grid.Row="0" Grid.Column="1" Text="{Binding FamilyName, NotifyOnValidationError=True, ValidatesOnDataErrors=True}" />

    <Label Grid.Row="1" Grid.ColumnSpan="2" Content="Persons" />

    <Grid Grid.Row="2" Grid.ColumnSpan="2">
        <Grid.ColumnDefinitions>
            <ColumnDefinition Width="*" />
            <ColumnDefinition Width="Auto" />
        </Grid.ColumnDefinitions>

        <ListBox Grid.Column="0" ItemsSource="{Binding Persons}" SelectedItem="{Binding SelectedPerson}">
            <ListBox.ItemTemplate>
                <DataTemplate>
                    <views:PersonView DataContext="{Binding}" />
                </DataTemplate>
            </ListBox.ItemTemplate>
        </ListBox>

        <StackPanel Grid.Column="1">
            <Button Command="{Binding AddPerson}" Content="Add..." />
            <Button Command="{Binding EditPerson}" Content="Edit..." />
            <Button Command="{Binding RemovePerson}" Content="Remove" />
        </StackPanel>
    </Grid>
</Grid>
Up next
Hooking up everything together
Contributions
We would like to thank the following contributors:
Want to contribute to the documentation? We have a guide for that!
Questions
Have a question about Catel? Use StackOverflow with the Catel tag!